UISearchController Tutorial: Getting Started
https://www.raywenderlich.com/113772/uisearchcontroller-tutorial


ote: Updated for Xcode 7.3, iOS 9.3, and Swift 2.2 on 04-03-2016
Update note: This tutorial was updated to iOS 9 and Swift 2 by Andy Pereira. Original post by Tutorial Team Member Nicolas Martin.
If your app displays large datasets, scrolling through massive lists becomes slow and frustrating. In that case, it’s vitally important to allow users to search for specific items. Lucky for you, UIKit includes
UISearchBar which seamlessly integrates with UITableView and allows for quick, responsive filtering of information.
In this
UISearchController tutorial, you’ll build a searchable Candy app which is based on a standard table view. You’ll add table view search capability, including dynamic filtering, and add an optional scope bar, all while taking advantage of UISearchController, added in iOS 8. In the end, you’ll know how to make your apps much more user friendly and satisfy your users’ urgent demands.
Ready for some sugar-coated search results? Read on.
Getting Started
Download the starter project from the tutorial here and open the project. The app has already been set up with a navigation controller and styling. Build and run the app; you’ll see an empty list:
Back in Xcode, the file Candy.swift contains a class to store the information about each piece of candy you’ll be displaying. This class has two properties: the category and name of the candy.
When the user searches for a candy in your app, you’ll be referencing the name property against the user’s search string. You’ll see how the category string will become important near the end of this tutorial when you implement the Scope Bar.
Populating the Table View
Open MasterViewController.swift. The
candies property will be where you manage all the different Candy objects for your users to search. Speaking of which, it’s time to create some Candy!
In this tutorial, you only need to create a limited number of values to illustrate how the search bar works; in a production app, you might have thousands of these searchable objects. But whether an app has thousands of objects to search or just a few, the methods used will remain the same. Scalability at its finest!
To populate your
candies array, add the following code to viewDidLoad(), after the call to super.viewDidLoad():candies = [
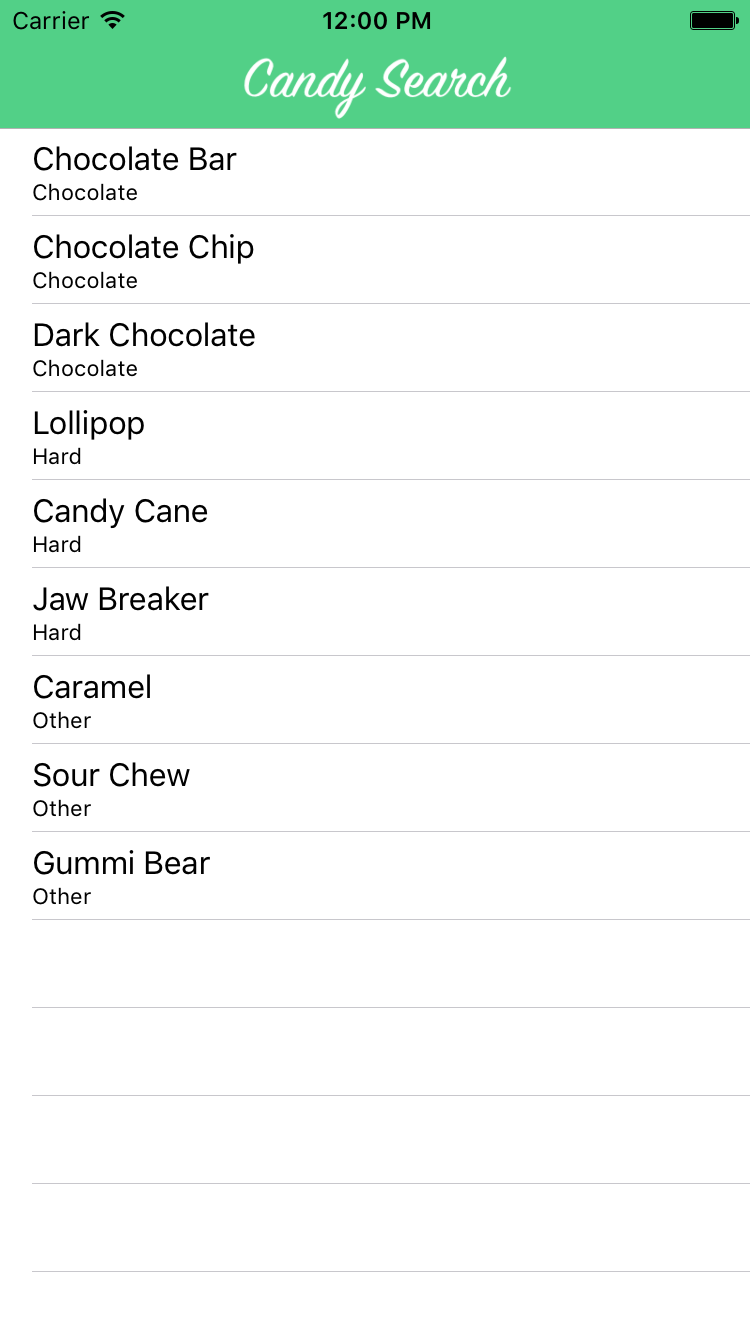
Candy(category:"Chocolate", name:"Chocolate Bar"),
Candy(category:"Chocolate", name:"Chocolate Chip"),
Candy(category:"Chocolate", name:"Dark Chocolate"),
Candy(category:"Hard", name:"Lollipop"),
Candy(category:"Hard", name:"Candy Cane"),
Candy(category:"Hard", name:"Jaw Breaker"),
Candy(category:"Other", name:"Caramel"),
Candy(category:"Other", name:"Sour Chew"),
Candy(category:"Other", name:"Gummi Bear")
]
Go ahead and build and run your project again. Since the table view’s delegate and datasource methods have already been implemented, you’ll see that you now have a working table view:
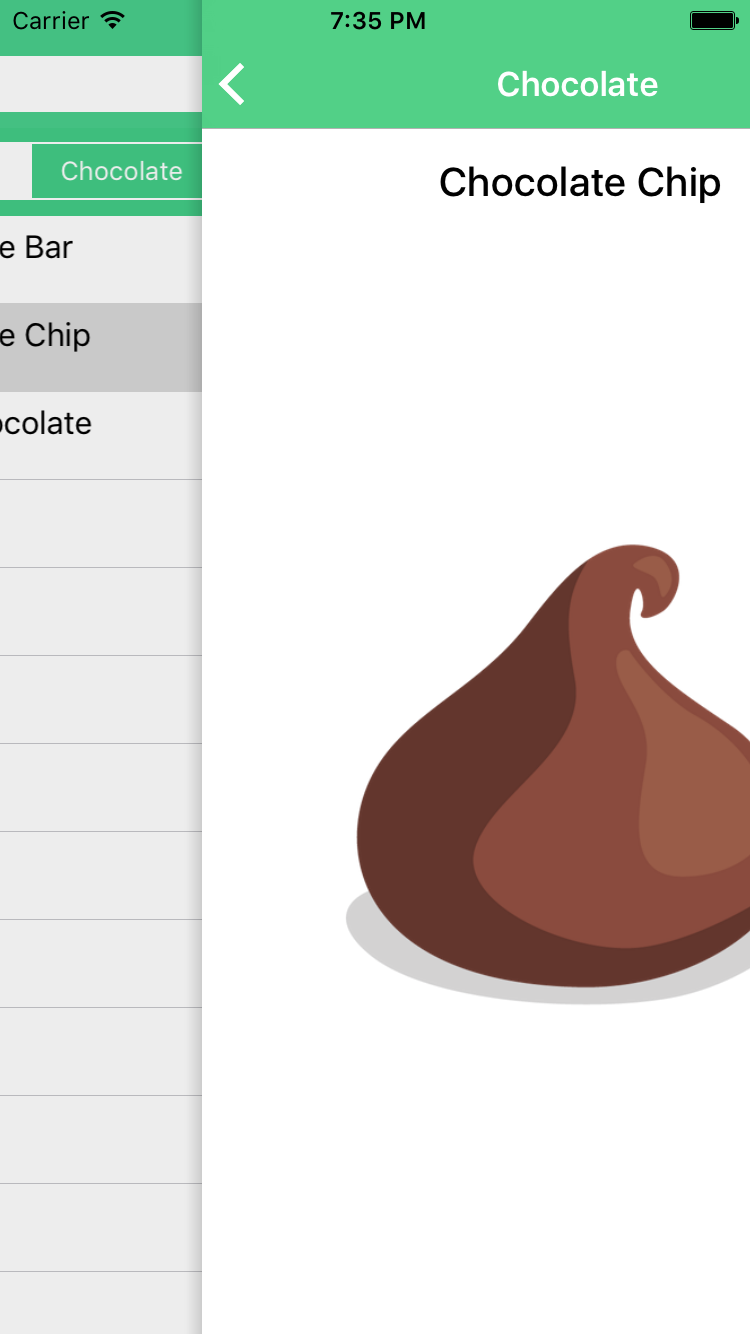
Selecting a row in the table will also display a detail view of the corresponding candy:
So much candy, so little time to find what you want! You need a
UISearchBar.Introducing UISearchController
If you look at the
UISearchController documentation, you’ll discover it’s pretty lazy. It doesn’t do any of the work of searching at all. The class simply provides a standard interface that users have come to expect from their iOS apps.UISearchController communicates with a delegate protocol to let the rest of your app know what the user is doing. You have to write all of the actual functionality for string matching yourself.
Although this may seem a tad scary at first, writing custom search functions gives you tight control over how results are returned specifically in your app. Your users will appreciate searches that are intelligent — and fast.
If you’ve worked with searching table views iOS in the past, you may be familiar with
UISearchDisplayController. Since iOS 8, this class has been deprecated in favor of UISearchController, which simplifies the entire search process.
Unfortunately, at the time of this writing, Interface Builder does not support
UISearchController, so you’ll have to create your UI programmatically.
In MasterViewController.swift, add a new property:
let searchController = UISearchController(searchResultsController: nil)
By initializing
UISearchController without a searchResultsController, you are telling the search controller that you want use the same view that you’re searching to display the results. If you specify a different view controller here, that will be used to display the results instead.
Next, you’ll need to set up a few parameters for your searchController. Still in MasterViewController.swift, add the following to
viewDidLoad(): searchController.searchResultsUpdater = self
searchController.dimsBackgroundDuringPresentation = false
definesPresentationContext = true
tableView.tableHeaderView = searchController.searchBar
Here’s a rundown of what you added:
searchResultsUpdateris a property onUISearchControllerthat conforms to the new protocolUISearchResultsUpdating. This protocol allows your class to be informed as text changes within theUISearchBar. You’ll make the class conform to the protocol in a short while.- By default,
UISearchControllerwill dim the view it is presented over. This is useful if you are using another view controller forsearchResultsController. In this instance, you have set the current view to show the results, so you do not want to dim your view. - By setting
definesPresentationContexton your view controller totrue, you ensure that the search bar does not remain on the screen if the user navigates to another view controller while theUISearchControlleris active. - Finally, you add the
searchBarto your table view’stableHeaderView. Remember that Interface Builder is not yet compatible withUISearchController, making this necessary.
UISearchResultsUpdating and Filtering
After setting up the search controller, you’ll need to do some coding work to get it working. First, add the following property near the top of
MasterViewController:var filteredCandies = [Candy]()
This property will hold the candies that the user is searching for. Next, add the following helper method to the main
MasterViewController class:func filterContentForSearchText(searchText: String, scope: String = "All") {
filteredCandies = candies.filter { candy in
return candy.name.lowercaseString.containsString(searchText.lowercaseString)
}
tableView.reloadData()
}
This filters the
candies array based based on searchText and will put the results in the filteredCandies array you just added. Don’t worry about the scope parameter for now, you’ll use that in a later section of this tutorial.
To allow
MasterViewController to respond to the search bar, it will have to implement UISearchResultsUpdating. Open MasterViewController.swift and add the following class extension, outside of the main MasterViewController class:extension MasterViewController: UISearchResultsUpdating {
func updateSearchResultsForSearchController(searchController: UISearchController) {
filterContentForSearchText(searchController.searchBar.text!)
}
}
The
updateSearchResultsForSearchController(_:) method is the one and only method that your class must implement to conform to the UISearchResultsUpdating protocol.
Now, whenever the user adds or removes text in the search bar, the
UISearchController will inform the MasterViewController class of the change via this method. The method itself simply calls a helper method (which you’ll define soon) with the text currently in the search bar.filter() takes a closure of type (candy: Candy) -> Bool. It then loops over all the elements of the array, and calls the closure, passing in the current element, for every one of the elements.
You can use this to determine whether a candy should be part of the search results that are presented to the user. To do so, you need to return
true if the current candy is to be included in the filtered array, or false if not.
To determine this,
containsString(_:) is used to check to see if the name of the candy contains searchText. But before doing the comparison, you convert both strings to their lowercase equivalents using the lowercaseString method.
Note: Most of the time, users don’t bother with the case of letters when performing a search so by only comparing the lowercase version of what they type with the lowercase version of the name of each candy you can easily return a case-insensitive ‘match’. Now, you can type “Chocolate” or “chocolate” and either will return a matching candy. How useful is that?! :]
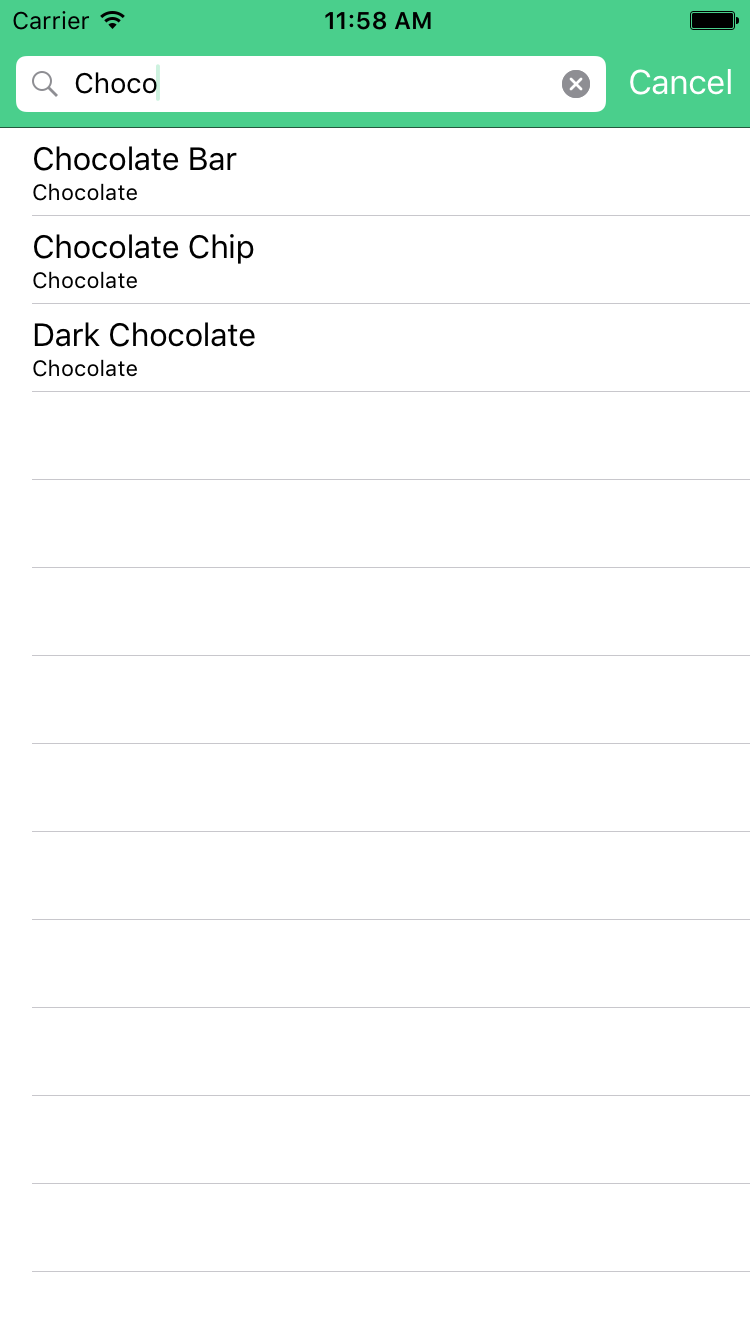
Build and run the app now; you’ll notice that there is now a Search Bar above the table.
However, if you enter some search text you still don’t see any filtered results. What gives? This is simply because you haven’t yet written the code to let the table view know when to use the filtered results.
Back in MasterViewController.swift, replace
tableView(_:numberOfRowsInSection:) with the following:override func tableView(tableView: UITableView, numberOfRowsInSection section: Int) -> Int {
if searchController.active && searchController.searchBar.text != "" {
return filteredCandies.count
}
return candies.count
}
Not much has changed here, you simply check whether the user is searching or not, and use either the filtered or normal candies as a data source for the table.
Next, replace
tableView(_:cellForRowAtIndexPath:) with:override func tableView(tableView: UITableView, cellForRowAtIndexPath indexPath: NSIndexPath) -> UITableViewCell {
let cell = tableView.dequeueReusableCellWithIdentifier("Cell", forIndexPath: indexPath)
let candy: Candy
if searchController.active && searchController.searchBar.text != "" {
  candy = filteredCandies[indexPath.row]
} else {
  candy = candies[indexPath.row]
}
cell.textLabel?.text = candy.name
cell.detailTextLabel?.text = candy.category
return cell
}
Both methods now refer to the
active property of searchController to determine which array to display.
When the user clicks in the search field of the Search Bar,
active will automatically be set to true. If the search controller is active, you then see if the user has actually typed something into the search field. If they have, the data returned is taken from the filteredCandies array. Otherwise, the data comes from the full list of items.
Recall that the search controller automatically handles showing and hiding the results table, so all your code has to do is provide the correct data (filtered or non-filtered) depending on the state of the controller and whether the user has searched for anything.
Build and run the app. You’ve got a functioning Search Bar that filters the rows of the main table. Huzzah!
Play with the app for a bit to see how you can search for various candies.
There’s still one more problem. When you select a row from the search results list, you may notice that the detail view shown can be of the wrong candy! Time to fix that.
Sending Data to a Detail View
When sending information to a detail view controller, you need to ensure that the view controller knows which context the user is working with: the full table list, or the search results. Still in MasterViewController.swift, in
prepareForSegue(_:sender:), find the following code:let candy = candies[indexPath.row]
Then replace it with the following:
let candy: Candy
if searchController.active && searchController.searchBar.text != "" {
candy = filteredCandies[indexPath.row]
} else {
candy = candies[indexPath.row]
}
Here you performed the same check that
tableView(_:numberOfRowsInSection:) and tableView(_:cellForRowAtIndexPath:) do, but now you’re providing the proper candy object when performing a segue to the detail view controller.
Build and run the code at this point and see how the app now navigates correctly to the Detail View from either the main table or the search table with ease.
Creating a Scope Bar to Filter Results
If you wish to give your users another way to filter their results, you can add a Scope Bar in conjunction with your search bar in order to filter out items by their category. The categories you will filter on are the ones you assigned to the
Candy object when you created the candies array: Chocolate, Hard, and Other.
First, you have to create a scope bar in
MasterViewController. The scope bar is a segmented control that narrows down a search by only searching in certain scopes. A scope is really what you define it as. In this case it’s a candy’s category, but scopes could also be types, ranges, or something completely different.
Using the scope bar is as easy as implementing one additional delegate method.
In MasterViewController.swift, you’ll need to add another extension that conforms to
UISearchBarDelegate. Add the following after your UISearchResultsUpdating extension:extension MasterViewController: UISearchBarDelegate {
func searchBar(searchBar: UISearchBar, selectedScopeButtonIndexDidChange selectedScope: Int) {
filterContentForSearchText(searchBar.text!, scope: searchBar.scopeButtonTitles![selectedScope])
}
}
This delegate methods gets called when the user switches the scope in the scope bar. When that happens, you want to redo the filtering, so you call
filterContentForSearchText(_:scope:) with the new scope.
Now modify
filterContentForSearchText(_:scope:) to take the supplied scope into account:func filterContentForSearchText(searchText: String, scope: String = "All") {
filteredCandies = candies.filter { candy in
let categoryMatch = (scope == "All") || (candy.category == scope)
return categoryMatch && candy.name.lowercaseString.containsString(searchText.lowercaseString)
}
tableView.reloadData()
}
This now checks to see if the scope provided is either set to “All” or it matches the category of the candy. Only when this is the case is the candy name tested to see if the candy should be added to the
filteredCandies.
You’re almost there, but the scope filtering mechanism doesn’t quite work yet. You’ll need to modify
updateSearchResultsForSearchController(_:) in the first class extension you created to send the currently selected scope:func updateSearchResultsForSearchController(searchController: UISearchController) {
let searchBar = searchController.searchBar
let scope = searchBar.scopeButtonTitles![searchBar.selectedScopeButtonIndex]
filterContentForSearchText(searchController.searchBar.text!, scope: scope)
}
The only problem left is that the user doesn’t actually see a scope bar yet! To add the scope bar, navigate to MasterViewController.swift, after the search controller setup in
viewDidLoad(), and add the following code:searchController.searchBar.scopeButtonTitles = ["All", "Chocolate", "Hard", "Other"]
searchController.searchBar.delegate = self
This will add a scope bar to the search bar, with the titles that match the categories you assigned to your candy objects. You also include a catch-all category called “All” that you will use to ignore the candy category in the search altogether.
Now, when you type, the selected scope button will be used in conjunction with the search text.
Build and run your app. Try entering some search text, and changing the scope.

Type in “caramel” with the scope set to All. It shows up in the list, but when you change the scope to Chocolate, “caramel” disappears because it’s not a chocolate.
Where To Go From Here?

Congratulations – you now have a working app that allows you to search directly from the main table view. Here is a downloadable sample project with all of the code from the above tutorial.
Table views are used in all kinds of apps, and offering a search option is a nice touch for usability. With
UISearchBar and the UISearchController, iOS provides much of the functionality out of the box so there’s no excuse for not using it. The ability to search a large table view is something that today’s users expect; when they find it isn’t present, they won’t be happy campers.
Don’t let this happen to your users. Always give them a search option.
I hope to see you adding search capabilities to your table view apps in the future. If you have any questions or comments, please join the forum discussion below.


Good Post! Thank you so much for sharing this pretty post, it was so good to read and useful to improve my knowledge as updated one, keep blogging…!!..iOS Swift Online Training
ReplyDeletemmorpg
ReplyDeleteİnstagram Takipci Satın Al
Tiktok Jeton Hilesi
tiktok jeton hilesi
antalya saç ekimi
referans kimliği nedir
İnstagram Takipçi Satın Al
metin2 pvp serverlar
instagram takipçi satın al
Fon Perde Modelleri
ReplyDeleteSms Onay
vodafone mobil ödeme bozdurma
nft nasıl alınır
Ankara Evden Eve Nakliyat
TRAFİK SİGORTASI
dedektör
web sitesi kurma
Aşk Kitapları
smm panel
ReplyDeletesmm panel
iş ilanları
İnstagram Takipçi Satın Al
HIRDAVAT
beyazesyateknikservisi.com.tr
Servis
tiktok jeton hilesi
maltepe toshiba klima servisi
ReplyDeleteümraniye lg klima servisi
çekmeköy lg klima servisi
ataşehir arçelik klima servisi
maltepe samsung klima servisi
kadıköy samsung klima servisi
tuzla samsung klima servisi
çekmeköy toshiba klima servisi
maltepe daikin klima servisi
en son çıkan perde modelleri
ReplyDeletenft nasıl alınır
lisans satın al
özel ambulans
uc satın al
en son çıkan perde modelleri
yurtdışı kargo
minecraft premium